
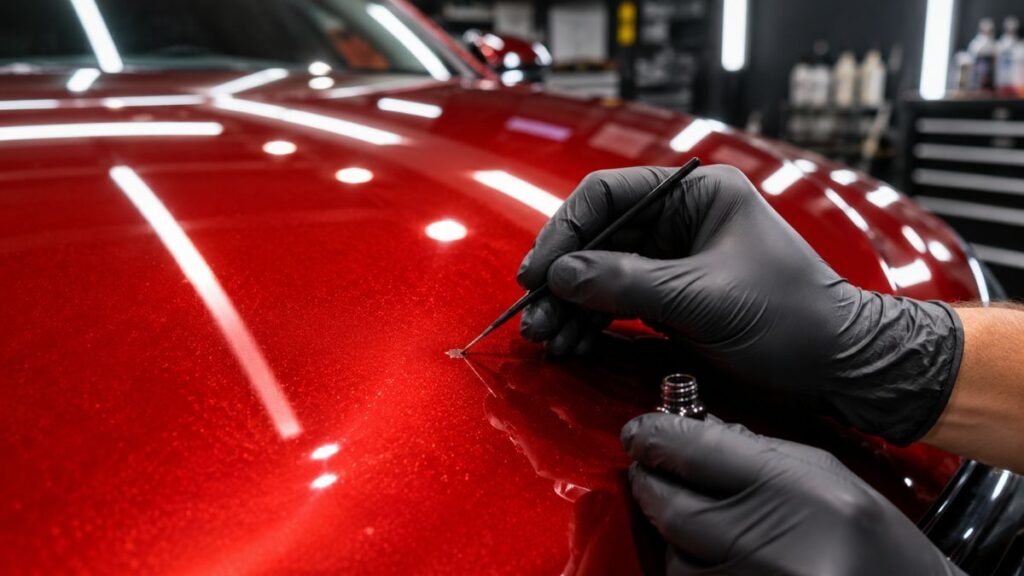
Learning how to fix paint chips on car body panels is one of the most valuable skills any vehicle owner can master. Whether it is a stray stone launched by a highway semi-truck, an accidental belt-buckle swipe, or an unexpected door ding in a crowded parking lot, paint chips are an inevitable part of driving.
While a tiny nick on your hood or bumper might seem like a minor cosmetic eye-sore at first, leaving exposed bare metal unprotected invites moisture, road salt, and harsh rain. Over time, environmental exposure leads to creeping rust spots under the clear coat that peel away large chunks of surrounding paint, turning a simple $20 touch-up fix into a $1,000+ body shop respray.
In this ultimate detailing guide by AutoGlowHacks, we break down how to fix paint chips on car paintwork safely at home, step-by-step. You will learn how to find your exact factory paint code, choose between paint pens vs. micro-brushes, level raised touch-up blobs, and blend the repaired area seamlessly into your clear coat for a showroom finish!
📊 Summary: DIY vs. Pro Repair at a Glance
| Feature / Metric | DIY Touch-Up Repair | Professional Body Shop / SMART Repair |
| Estimated Cost | $15 – $45 | $150 – $600+ |
| Time Required | 45 Mins – 2 Hours | 1 – 3 Days |
| Best For | Small stone nicks, thin scratches, minor chips | Multiple deep gouges, wide rust spots, bent panels |
| Tools Needed | Touch-up paint, isopropyl alcohol, micro-brush/toothpick | Professional spray booth, orbital sanders, clear coat respray |
| Longevity | Excellent (When primed & clear-coated) | Factory Grade |
Why You Must Fix Car Paint Chips Immediately
Your car’s paint is not just for aesthetics—it acts as an engineered shield comprising three distinct layers:
- The Primer Layer: Seals the raw sheet metal against rust.
- The Base Coat (Color): Provides the vehicle’s unique pigment, metallic flakes, or pearl coat.
- The Clear Coat: A transparent, UV-resistant polyurethane hardener protecting the pigment.
When a sharp road stone punctures through these protective layers down to the primer or bare metal, the seal is broken. Atmospheric oxygen, rain, and winter road salt immediately enter the microscopic crater. Knowing how to fix paint chips on car panels early stops oxidation dead in its tracks. Once corrosion sets in, rust expands beneath the surrounding healthy paint, weakening the chemical bond and causing widespread paint flaking.
Essential Supplies You Need Before Starting
Before diving into the repair process, gather these detailing supplies so you know exactly how to fix paint chips on car surfaces without scratching adjacent panels:
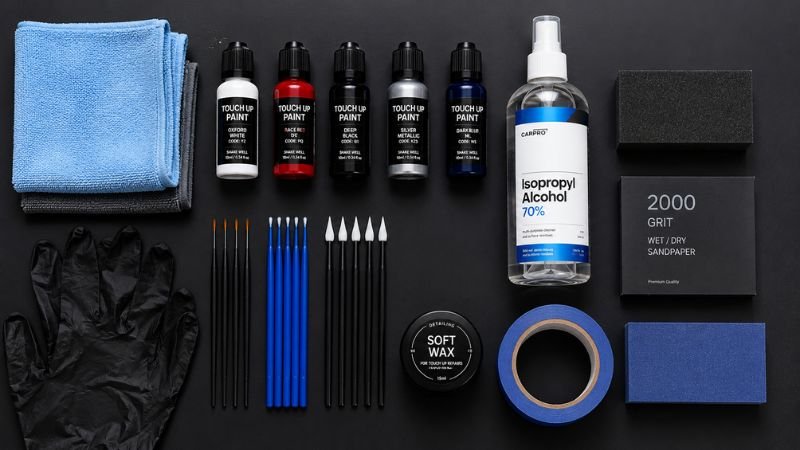
- Factory-Matched Automotive Touch-Up Paint: High-quality paint matched to your exact vehicle paint code.
- Automotive Primer: Essential if the chip exposes silver bare metal or brown rust.
- Automotive Clear Coat Pen / Lacquer: To seal the color coat and restore high gloss.
- 70% Isopropyl Alcohol (IPA) or Wax Remover: To thoroughly degrease the crater before painting.
- Precision Micro-Brushes or Plastic Toothpicks: Pro Tip: Standard wooden toothpicks absorb paint, while plastic toothpicks or fine micro-brushes draw paint smoothly into small craters without over-spilling.
- 2000-Grit & 3000-Grit Wet Sandpaper: (Optional) For leveling raised paint blobs flush with surrounding panels.
- Ultrafine Microfiber Towels & Polishing Compound: To buff out sanding hazing and restore depth. For high-grade finishing compounds, check out Meguiar’s Paint Care Products for professional surface correction.
- Blue Painter’s Masking Tape: To isolate the chipped area and protect adjacent clear coat.
How to Find Your Vehicle’s Exact Paint Code
Using generic “Universal Red” or “Standard White” touch-up bottles from a local discount store is the fastest way to ruin your car’s appearance. When mastering how to fix paint chips on car paintwork, understanding that automobile paints dry darker and metallic/pearl flakes vary significantly between production years is vital.
To locate your exact vehicle color code:
- Open the driver’s side door and inspect the VIN Safety Standard Sticker located on the door jamb or frame pillar.
- Look for the label marked “PAINT”, “PNT”, “COLOR”, or a 3-character code (e.g., NH-731P for Honda, WA8555 for GM, or LY9B for Audi/VW).
- Alternatively, check your vehicle owner’s manual under vehicle specifications or call your local dealership service department with your VIN number.
5 Steps: How to Fix Paint Chips on Car Panels Like a Pro
Step 1: Wash, Inspect, and Degrease the Damaged Area
Never apply touch-up paint over road grime, car wax, or ceramic coatings.
- Wash the panel thoroughly with pH-balanced car soap and warm water, then dry completely with a plush microfiber towel.
- Saturate a clean microfiber cloth with 70% Isopropyl Alcohol and thoroughly wipe inside and around the paint chip crater. This strips away embedded waxes, silicone, and oils so the new paint bonds permanently.
- Apply blue painter’s tape around the chip, leaving a tiny 1-millimeter border around the damage.
Step 2: Prep the Chip & Treat Surface Rust (If Present)
Inspect the center of the chip under bright lighting.
- Clear Coat Only Chip: If the crater matches the surrounding color and looks like a shallow clear coat divot, skip to Step 4.
- Bare Metal Exposed: If you see shiny silver metal, the chip went through the primer.
- Surface Rust Present: If you spot reddish-brown rust, use a fiberglass sander pen or a tiny piece of folded 2000-grit wet sandpaper rolled around a pencil eraser. Gently twirl it inside the crater to scrape away all oxidation until clean, shiny metal appears.
⚠️ Pro Detailing Rule: Never apply touch-up paint over active rust! Understanding how to fix paint chips on car hoods correctly requires stripping rust completely, as corrosion will continue eating away metal underneath fresh paint.
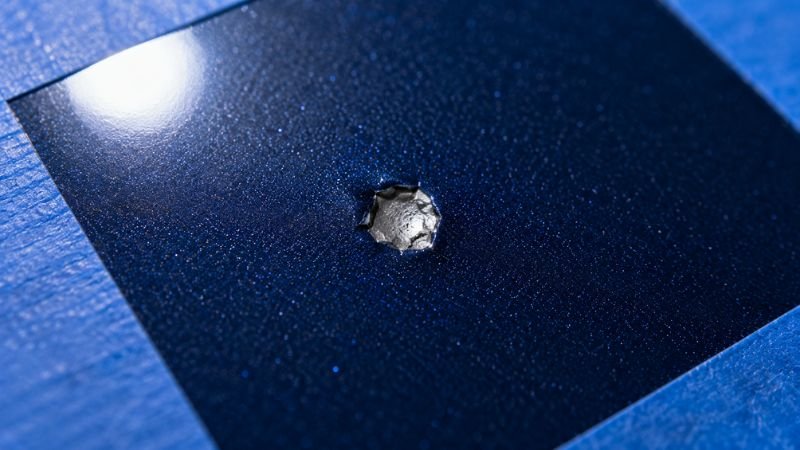
Step 3: Apply Automotive Primer (For Deep Chips)
If bare metal was exposed:
- Dip the tip of a fine micro-brush or plastic toothpick into automotive primer.
- Touch the tip to the center of the bare metal spot. Capillary action will draw the liquid primer off the tip into the crater without touching the surrounding clear coat.
- Allow the primer to dry completely for 20 to 30 minutes.
Step 4: Layer the Color Touch-Up Paint
Understanding how to fix paint chips on car paint surfaces correctly requires patience—never flood the chip crater with one thick blob of paint! Paint shrinks as its solvents evaporate.
- Shake your touch-up paint bottle vigorously for 1 to 2 minutes to ensure metallic pigments and color concentrates are mixed thoroughly.
- Dip your plastic toothpick or micro-brush into the paint to grab a tiny drop.
- Dab the paint into the center of the chip. Allow the paint to flow outward toward the edges naturally.
- Apply 2 to 3 thin layers, waiting 15 to 20 minutes between coats. Build the color up until it fills about 80% to 90% of the crater’s depth, leaving slight headroom for the final clear coat layer.
Step 5: Seal With Clear Coat, Level, and Polish
- After letting the base color coat cure for 30 to 45 minutes, apply a small dab of clear coat lacquer over the repair. Build the clear coat layer so it sits slightly higher than the surrounding factory paint.
- Allow the clear coat to cure for at least 24 hours.
- Leveling the Blob: Wrap a small block or rubber eraser with 2000-grit wet/dry sandpaper, lubricate the area with soapy water, and use extremely light pressure to gently sand the raised clear coat blob flush with the surrounding panel.
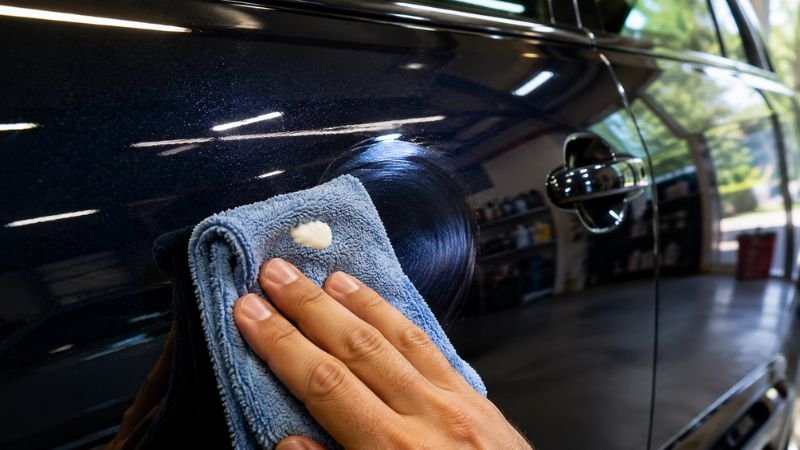
- Buffing & Restoring Gloss: Wipe away sanding residue. Apply a dab of finishing polishing compound onto a clean microfiber towel or dual-action polishing pad and buff the area in straight lines until the dull sanding haze disappears into a glossy finish.
Common DIY Mistakes to Avoid
- Using the Touch-Up Bottle Brush: The built-in brushes included inside cheap touch-up bottles are far too thick and drop massive, uneven paint blobs that look terrible. Always use a micro-brush or plastic toothpick instead.
- Painting in Direct Sunlight: Applying touch-up paint under hot afternoon sun causes solvents to flash instantly, leaving dry, clumpy paint textures that won’t level smoothly. Always work in a shaded garage between 50°F and 85°F (10°C to 29°C).
- Over-Sanding Surrounding Clear Coat: Be cautious when wet-sanding your repair spot. Factory clear coats are paper-thin; aggressive circular sanding can cut through adjacent clear coat, creating a permanent ring (halo) around your repair.
Frequently Asked Questions (FAQs)
Can I learn how to fix paint chips on car panels without wet sanding?
Yes! If you prefer a simpler, no-sanding approach, use a specialized paint chip repair kit that includes a blending solvent solution. These systems allow you to dab touch-up paint into chips and wipe off excess paint from surrounding surfaces using a cloth soaked in blending fluid without scratching clear coat.
How long does car touch-up paint take to fully cure?
While touch-up paint becomes dry to the touch within 20 to 30 minutes, it takes roughly 24 to 48 hours to cure fully. Avoid applying heavy car waxes, ceramic coatings, or pressure-washing the repaired panel for at least 7 days after completing the repair.
Is it safe to use WD-40 or dish soap before applying touch-up paint?
No. Household dish soaps leave behind slippery surfactant films, and WD-40 leaves heavy petroleum oil layers that prevent new paint from bonding. Always clean paint chip craters with 70% Isopropyl Alcohol or automotive panel prep wipes when learning how to fix paint chips on car paintwork safely.
Final Thoughts
Knowing how to fix paint chips on car bodywork saves hundreds of dollars while protecting your vehicle’s resale value and structural integrity against rust. Taking your time, using proper micro-applicators, and matching exact paint codes ensures your DIY repair stays invisible to the naked eye.
Once your exterior bodywork is smooth, clean, and chip-free, protect your interior using our detailed guide on how to remove stains from car seats, or refresh your fabric upholstery with simple steps on how to clean cloth seats in the car!