
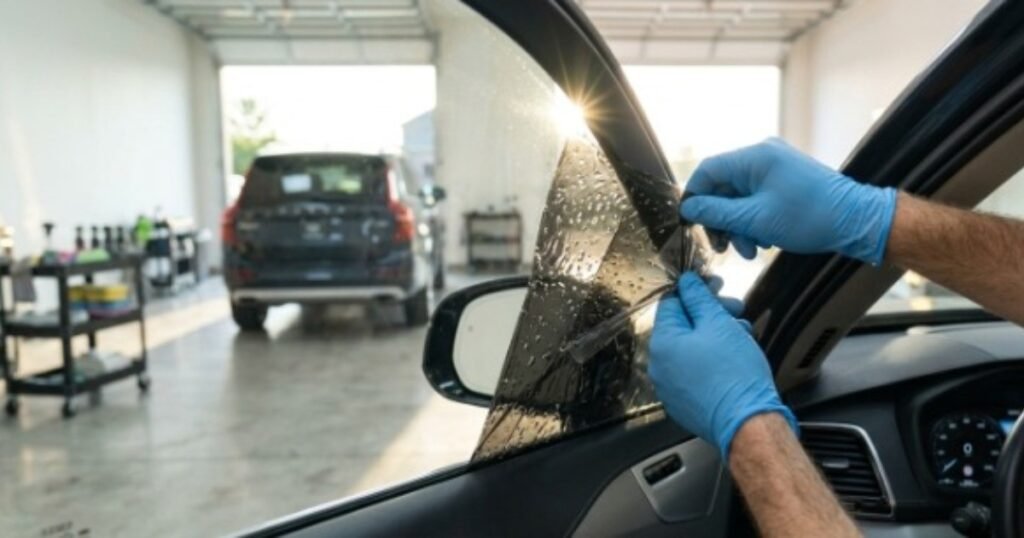
Remove tinted window film from a car easily with our 2 step-by-step methods without scratching the glass or ruining your rear defroster lines. A high-quality window tint serves multiple purposes. It enhances cabin privacy, blocks harmful UV rays, keeps your car interior cool, and adds a sleek, modern aesthetic to your ride. However, there comes a time when that once-perfect tint film needs to go. Whether it is due to ugly bubbling, purple discoloration, outdated styling, or simply a change in local state laws, the decision to remove tinted window film from a car is a task that almost every vehicle owner faces at some point.
While it might seem like a simple weekend DIY project, peeling off old tint isn’t as easy as removing a bumper sticker. If you approach it without the right tools and techniques, you risk scratching your glass, leaving behind a sticky, impossible-to-clean adhesive residue, or permanently destroying the delicate defroster grid lines on your rear windshield.
In this ultimate guide, we will break down the absolute best, safest, and most professional methods to remove tinted window film from a car without causing a single scratch.
Why Is Your Window Tint Failing? (When to Remove It)
Window tint is applied directly to the interior side of your car’s glass panels. Over time, the materials used in aftermarket films begin to degrade due to constant exposure to sunlight, moisture, and temperature fluctuations. While keeping your glass clear is essential for safety, keeping your cabin floor clean is equally important—if your carpets have trapped stubborn dirt and mud, check out our guide on how to clean car carpet to restore your floor mats. Below are the most common signs that it is time to remove tinted window film from a car:
- Ugly Bubbles and Blisters: Extreme summer heat and freezing winter temperatures can break down the adhesive layer beneath the film. This creates trapped pockets of air, resulting in unsightly bubbles that block your view and ruin your car’s overall appearance.
- Purple Discoloration: If your once-dark tint is starting to look purple or bluish, the non-metallic dyes inside the polyester film have broken down. A purple tint loses almost all of its UV protection and heat rejection properties, making it practically useless.
- Legal Compliance and Fines: US states have incredibly strict laws regarding the allowable Visible Light Transmission (VLT) percentage. If you purchased a used car with illegal, pitch-black tint, you must remove tinted window film from a car to avoid getting expensive police citations and fines.
- Scratches and Wear: Seatbelt buckles, jewelry, or pets can easily scratch the interior film. Once a scratch forms, the film begins to peel away slowly at the edges, catching dirt and looking highly unprofessional.
The Golden Rule: Protect Your Rear Defroster Lines
Before we discuss the actual steps, you must understand the golden rule of how to safely remove tinted window film from a car: Never use a metal razor blade on your rear windshield.
Your rear window is equipped with thin, horizontal orange lines. These are your defroster lines—a delicate electrical grid that heats your glass to clear fog and ice during winter. If you scrape the rear glass with a metal razor, you will cut these lines, rendering your defroster completely useless and leaving you with an expensive glass replacement bill. This is why major automotive publications like Car and Driver always emphasize using proper glass-safe tools when working on car windshields and windows. For the rear window, only use heat, steam, and plastic scrapers.
Method 1: The Steam Method (The Safest Way for All Windows)
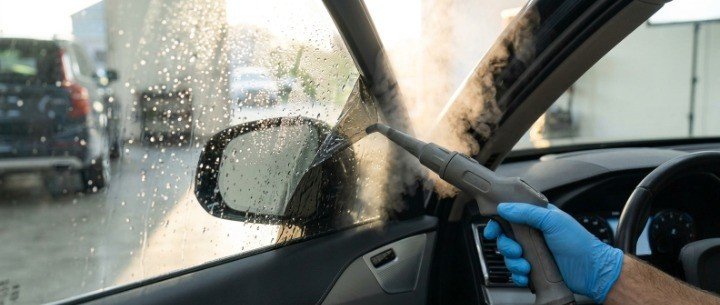
Using a manual clothing or upholstery steamer is universally considered by professional detailers as the absolute safest and cleanest way to remove tinted window film from a car. The moisture combined with gentle heat liquefies the sticky adhesive underneath, allowing the film to peel away in one beautiful, satisfying piece.
Step 1: Prep Your Side Windows
Roll your side windows down about a quarter of an inch. This gives you easy access to the very top edge of the tint film, where you will start the peeling process.
Step 2: Apply the Steam
Fill your steamer with water and let it heat up. Hold the steamer nozzle about one or two inches away from the glass. Start on the outside of the window first for about one minute to warm the glass safely. Then, move to the inside and run the steam slowly back and forth across the tint film for two to three minutes. This gradual heating is critical because blasting cold glass with intense heat can crack it.
Step 3: Start Peeling from a Corner
Use a plastic scraper or a razor blade (on side windows only) to gently lift one of the top corners of the film. Once you have a small flap loose, put the razor away and use your fingers to pull the film.
Step 4: Steam as You Pull
This is the secret to a clean peel. Do not just rip the film off. Pull slowly and keep directing the steam nozzle directly at the area where the film is separating from the glass. The steam will continuously melt the glue ahead of your pull, which is the absolute best strategy when you want to remove tinted window film from a car without leaving sticky residue behind.
Step 5: Clean Up the Glass
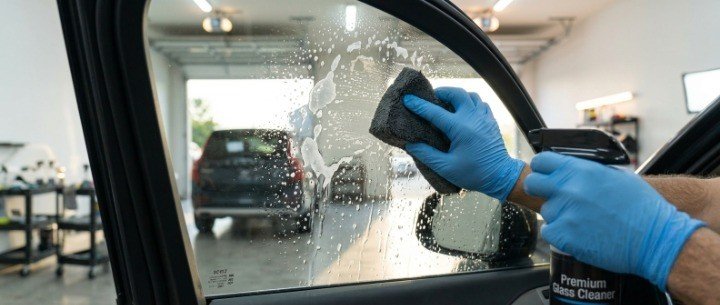
Once the film is off, spray the glass with an ammonia-free glass cleaner or a 50/50 mix of water and rubbing alcohol. Wipe it dry with a clean microfiber towel to catch any remaining adhesive traces. To get that glass completely spotless after peeling, you can use the best way to clean car windows to make sure your final glass clarity is absolutely perfect.
Method 2: The Ammonia & Solar Heat Method (The Classic US DIY Hack)
If you do not own a steamer, the ammonia and solar heat method is another highly effective strategy to remove tinted window film from a car on a hot, sunny day. This method uses the power of the sun combined with chemical vapors to dissolve the tough adhesive bonds.
Step 1: Protect Your Interior
Ammonia has a very strong, pungent odor and can damage your car’s interior materials. Before starting, drape heavy plastic sheeting or trash bags over your door panels, speakers, leather seats, and electrical switches. Never let chemicals drip on your upholstery—if you accidentally spill liquids on your fabric, learn how to remove stains from car seats using safe detailing techniques. Never use paper towels or newspaper for protection, as they will quickly absorb the chemical and let it leak onto your dashboard.
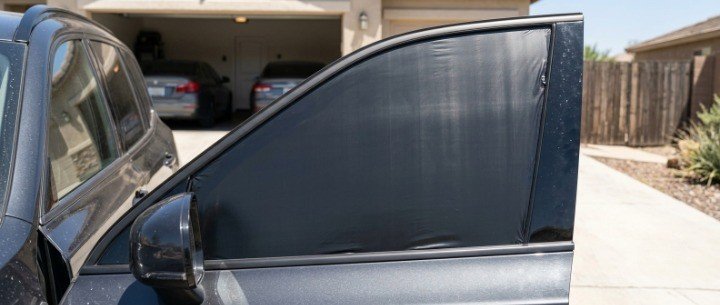
Step 2: Cut Black Trash Bags to Fit
Take a black plastic garbage bag, hold it against the outside of your car window, and trace its shape. Cut the plastic along the outline. You will need two cutouts for each window—one for the outside and one for the inside.
Step 3: Insulate the Outside of the Glass
Mix a solution of three-parts water and one-part liquid dish soap in a spray bottle. Spray the soapy water generously on the outside of the window and slap your first plastic cutout over it. Smooth it out with your hands. The soapy water will hold the black plastic in place, which will absorb maximum solar heat from the sun.
Step 4: Apply Ammonia to the Inside Tint
Put on safety gloves, protective goggles, and a nose mask. Spray undiluted household ammonia directly onto the inside tint film. Quickly cover the wet ammonia with your second plastic cutout to trap the chemical vapors against the film and prevent evaporation. This chemistry is incredibly useful when you need to remove tinted window film from a car with stubborn, baked-on adhesive.
Step 5: Let It Bake in the Sun
Park your vehicle directly in hot, bright sunlight and let it sit undisturbed for two hours. The solar heat combined with the trapped ammonia vapors will chemically attack the adhesive, turning it into a soft, jelly-like substance.
Step 6: Peel and Clean
Remove the plastic trash bags. Use a plastic scraper to lift a corner of the film and slowly peel it away. Because the adhesive has been completely dissolved, the film should slide off like a wet sheet. Immediately clean the glass with an ammonia-soaked sponge to remove any remaining glue, followed by a dry microfiber towel.
How to Remove Stubborn Sticky Glue Residue
The single biggest headache after you remove tinted window film from a car is dealing with the leftover adhesive. If you pulled the film off too fast or without enough heat, you will be left with a sticky, tacky layer on your glass that smears whenever you touch it.
To clean this residue quickly and safely:
- Spray with Rubbing Alcohol or Goo Gone: Isopropyl rubbing alcohol or a dedicated citrus-based adhesive remover is the best way to break down this specific glue. Spray it generously onto the sticky areas. This is a critical final step whenever you remove tinted window film from a car at home.
- Scrub with a Non-Scratch Pad: Use a safe scrub sponge (like a heavy-duty kitchen sponge with a non-scratch backing) to scrub the wet adhesive.
- Wipe with Steel Wool (0000 Grade Only): For stubborn side windows, you can use ultra-fine #0000 steel wool. It is soft enough that it will not scratch automotive glass, but it will easily slice through sticky glue. Never use this on the rear defroster lines.
- Final Wipe Down: Use a clean microfiber towel and a premium car glass cleaner to buff the window to a crystal-clear, streak-free finish.
Frequently Asked Questions (FAQs)
Can I use vinegar instead of ammonia for the solar method?
Yes! If you want to avoid the harsh, toxic smell of ammonia, you can use white vinegar. While vinegar is naturally acidic and safe to use, it does take slightly longer to break down the adhesive compared to chemical-grade ammonia. However, it remains a fantastic home remedy to remove tinted window film from a car safely.
How much does it cost to remove car window tint?
If you take your vehicle to a professional detailing shop, the cost to remove tinted window film from a car can cost anywhere between $100 and $225, depending on the number of windows and how old the film is. If you go the DIY route using the steam or trash bag method, it will only cost you about $10 to $15 for basic supplies.
Will removing my old tint damage my aftermarket tint on other windows?
Not at all. Each window is completely independent. You can easily remove tinted window film from a car on your front windows or rear windshield while leaving the rest of your vehicle’s tinted windows completely untouched.
Does the age of the tint affect how easy it is to remove?
Absolutely. Older tint films that have been on a vehicle for five to ten years are much more brittle. When you try to remove tinted window film from a car that has aged significantly, the film is highly likely to tear into tiny pieces rather than peeling off in one sheet, requiring extra heat and patience.
How do I prepare my windows for new tint after removal?
Once you successfully remove tinted window film from a car, you must ensure the glass is 100% free of residual glue. Use an isopropyl alcohol prep wipe to completely degrease the surface. Any microscopic adhesive spots left behind will cause bubbles in your new tint installation.
Conclusion
Mastering how to remove tinted window film from a car is an incredibly rewarding DIY skill that can save you hundreds of dollars. Whether you choose the gentle, moisture-rich Steam Method or the powerful, chemical-driven Ammonia solar hack, the key is patience. Take your time, apply consistent heat, protect your rear defroster lines, and never rush the peeling stage.
Once your glass is perfectly clean and clear, your car will immediately look years newer, your driving safety will improve, and you will have a flawless slate for a brand-new tint job! If you are completing a full cabin restoration and dealing with lingering odors, follow our step-by-step guide on how to get smoke smell out of car for a fresh interior. For more pro detailing secrets and vehicle washing hacks, head over to our main hub at AutoGlowHacks to keep your ride shining like new.