A weekend DIY car wash is more than just a routine chore—it is a satisfying ritual that keeps your vehicle looking brand new while protecting its market value. However, if done incorrectly, washing your car at home can leave behind unsightly swirl marks, water spots, and micro-scratches on your clear coat. If you want more practical detailing tips and guides, explore our full library on AutoGlowHacks.
Most car owners pull out an old bath towel, a single bucket, and dish soap, completely unaware that they are stripping away paint protection. To get a showroom-level shine without damaging your vehicle, you need the right tools, proper water pressure, and safe washing techniques. Performing a proper DIY car wash requires patience, attention to detail, and a structured workflow that prevents physical contaminants from rubbing into the paint.
In this ultimate guide, you will learn the exact step-by-step process for a professional DIY car wash, the ideal equipment to use, and the most common mistakes to avoid.
🛠️ Essential DIY Car Wash Supplies Checklist
Before turning on the hose, gather high-quality tools specifically designed for automotive finishes. Using the wrong supplies is the primary cause of paint damage during a DIY car wash. Investing in specialized gear transforms a basic home wash into a safe, scratch-free detailing routine.
| Equipment | Why You Need It | Recommended Type |
| Car Wash Soap | Safely lifts dirt without stripping wax | pH-neutral shampoo |
| Wash Mitts | Captures grit inside fibers away from paint | Soft Chenille Microfiber |
| Drying Towel | Prevents water spots and scratches | Plush 1200 GSM Microfiber |
| Buckets & Dirt Traps | Keeps dirty water away from the mitt | 3-Bucket Setup with Grit Guards |
| Wheel Cleaner | Dissolves stubborn brake dust safely | Non-corrosive, acid-free spray |
⚠️ Pro Note: Avoid household items like dish soap, kitchen sponges, or old t-shirts. Household dish soap is formulated to break down grease, meaning it will completely strip your car’s protective wax layer in a single wash! While deep cleaning the exterior during a DIY car wash, don’t forget your interior—check out our guide onhow to clean cloth seats in the carto keep your cabin spotless too.
🪣 The 3-Bucket Wash Method Explained
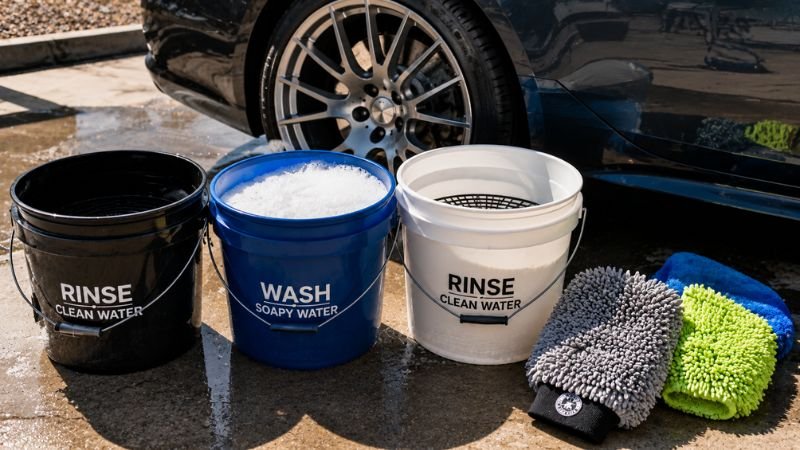
The standard method used by professional detailers is the 3-Bucket Wash Method. It creates a safety barrier between dirty road grit and your clear coat, making it an essential core of any safe DIY car wash.
- Bucket 1 (Soapy Water): Contains clean water mixed with your pH-neutral car soap.
- Bucket 2 (Rinse Water): Contains clean water used exclusively to rinse your dirty wash mitt after wiping down a panel.
- Bucket 3 (Wheels Only): Dedicated strictly to cleaning tires and wheels, which harbor heavy brake dust and harsh metal shavings.
By inserting a Grit Guard (Dirt Trap) at the bottom of each bucket, suspended dirt particles sink to the bottom, ensuring your wash mitt stays clean every time it touches your car. The primary goal during every stage of a DIY car wash is minimizing friction between grit and delicate clear coats.
💦 Water Pressure: Finding the Safe Zone
Water pressure plays a critical role in a safe DIY car wash. Too little pressure leaves dirt behind, while excessive pressure can force water past rubber seals, chip brittle paint, or bend wiper arms.
- Ideal Pressure Washer Rating: 1,200 to 1,900 PSI (GPM of 1.2 to 2.0).
- Safe Spray Nozzles: Stick to 25-degree (Green) or 40-degree (White) wide-angle nozzles.
- Safe Distance: Always maintain a distance of at least 12 to 18 inches from the bodywork.
- Standard Garden Hose: If you do not own a pressure washer, use a multi-pattern hose nozzle set to “Shower” or “Center” for gentle, continuous flow.
Mastering water delivery ensures that heavy mud and grime slide off effortlessly before you begin wiping down panels manually.
🚀 7 Steps to a Scratch-Free DIY Car Wash
Follow this top-down sequence for the safest and most efficient home car wash experience. Executing a successful DIY car wash relies on systematically removing abrasive dirt before touching the vehicle with mitts or towels.
Step 1: Park in the Shade
Never wash your vehicle under direct sunlight or when the hood is hot. Heat causes water and soap to evaporate rapidly, leaving behind stubborn mineral spots and soap scum that are difficult to buff out.
Step 2: Wash Wheels and Tires First
Wheels are the dirtiest part of any vehicle. Clean them first so that grime from the tires does not splash onto freshly cleaned paint panels later in your DIY car wash routine.
- Spray an acid-free wheel cleaner onto cold rims.
- Scrub sidewalls and inner wheel barrels using soft-bristled wheel brushes.
- Rinse thoroughly with high-pressure water using your dedicated wheel bucket.
Step 3: Perform a Pre-Rinse (Touchless Clean)
Before touching the paint with a mitt, rinse the entire vehicle from top to bottom. This removes loose sand, mud, and heavy debris, drastically lowering the risk of dragging abrasive grit across your paint during the contact wash. If you want to skip hand-washing on light dust days, understanding what is a touchless car wash can help you decide if automated options are safe for your paint.
Step 4: Apply a Foam Blanket (Optional Pre-Wash)
If you have a foam cannon attached to your pressure washer or a foam gun on your garden hose, coat the car in a thick layer of foam. Let it dwell for 3 to 5 minutes. The foam breaks down sticky road film and lifts surface contaminants safely before manual scrubbing begins.
Step 5: The Contact Wash (Top-to-Bottom)
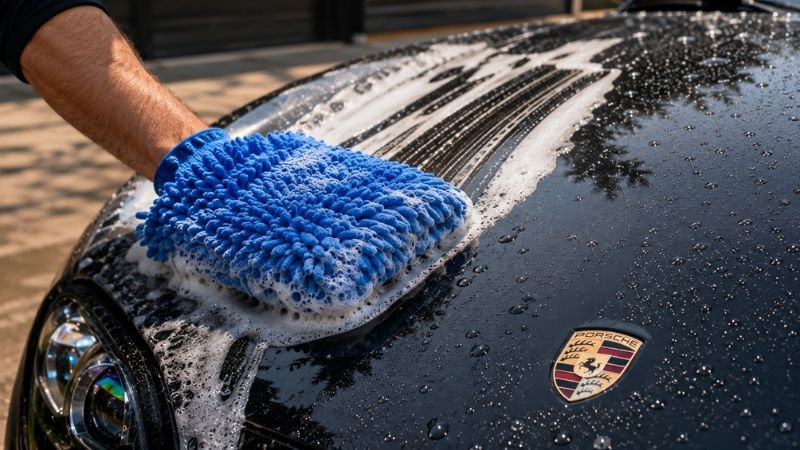
Dip your microfiber mitt into the soapy bucket, then gently glide it over the paint. This contact phase is where a DIY car wash either protects or damages your vehicle’s gloss finish.
- Work in Straight Lines: Never wash in circular motions. Straight, overlapping lines make any light surface marks far less visible than circular swirl marks.
- Top-to-Bottom Approach: Wash the cleanest areas first (roof, glass, hood) and finish with the dirtiest bottom panels (rocker panels and bumpers).
- Rinse Frequently: After completing one panel, dunk your mitt into the Rinse Bucket, scrub it against the dirt trap, wring out the dirty water, and re-soak in the Soapy Bucket.
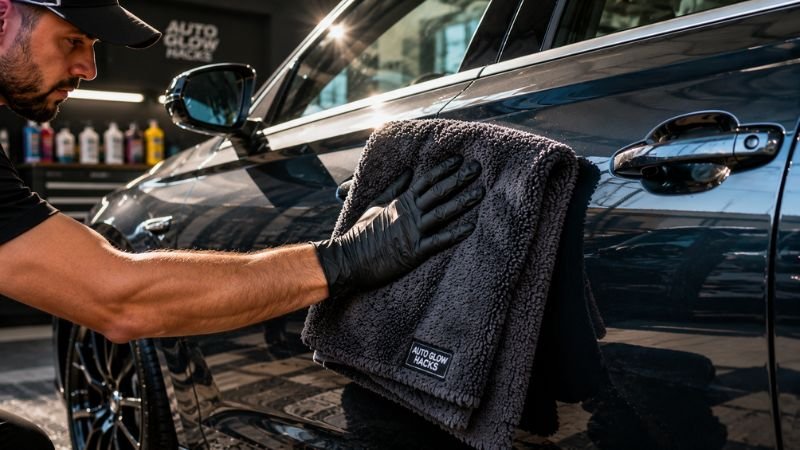
Step 6: Safe Drying (Blot, Don’t Drag)
Allowing your car to air-dry guarantees mineral water spots. According to experts at Edmunds Car Care Guides, improper drying methods and rough towels are among the top causes of micro-scratches on modern clear coats.
- Use a clean, plush microfiber drying towel or a filtered electric leaf blower.
- Gently blot or pat the wet surfaces dry instead of dragging a dry towel across the finish.
- Spritz a quick detailer spray on the wet panel to act as a drying lubricant for extra gloss and safety.
Step 7: Apply Paint Protection (Wax or Sealant)
After washing and drying, protect your clean paintwork. Apply a quality carnauba wax or a modern synthetic spray sealant every 2 to 3 months to shield your clear coat from UV rays, bird droppings, and environmental pollution. For long-lasting hydrophobics and advanced exterior defense, many car owners are also looking into a graphene car wash coating treatment to maximize paint protection. Finishing your DIY car wash with proper sealant application keeps dirt from sticking during future drives.
🚫 5 Costly DIY Car Wash Mistakes to Avoid
- Using Household Cleaners: Dish soaps, glass cleaners with ammonia, and laundry detergents break down rubber trim and strip paint sealants.
- Dropping Your Wash Mitt: If your microfiber mitt touches the ground, set it aside immediately. It picks up microscopic rocks that will heavily scratch your paint.
- Washing in Circular Motions: Scrubbing in circles creates deep, visible swirl marks under direct sunlight.
- Skipping the Pre-Rinse: Applying soap directly onto a dirty, dusty car drags grit directly across the lacquer.
- Ignoring Door Jambs: Moisture builds up in door jambs, trunk seals, and gas caps, leading to rust formation over time.
🧠 Advanced Exterior Care & Maintenance Tips
Beyond the basic wash, maintaining paint clarity requires understanding environmental hazards. Acidic rain, sap, and bird droppings chemically react with clear coats when left under hot sunlight. A proper DIY car wash schedule neutralizes these acidic compounds before permanent etching occurs.
When inspecting paint after a wash, look for bonded contaminants like tar specks or iron particles. If panels feel rough despite being washed clean, incorporating a detailing clay bar with lubricating spray removes embedded grit smoothly. Integrating these minor inspection steps into your regular DIY car wash workflow keeps your vehicle in pristine, showroom condition year-round.
❓ Frequently Asked Questions (FAQs)
How often should I perform a DIY car wash?
Washing your vehicle every 2 weeks is ideal for maintaining optimal paint health. Regular cleaning prevents acidic contaminants like bird droppings, tree sap, and road salt from burning into the clear coat.
Can I wash my car without running water?
Yes! If you live in an apartment or face water restrictions, you can use a rinseless wash solution. Rinseless wash products require just one bucket of water and no final hose rinse, encapsulating dirt safely with advanced polymers.
What should I do if my paint feels rough after washing?
If your paint feels rough like sandpaper even after a thorough DIY car wash, embedded contaminants remain in the clear coat. Use a detailing clay bar with clay lubricant to restore a silky-smooth texture before applying wax.
🎯 Conclusion
Mastering the DIY car wash process comes down to using proper techniques, pH-neutral products, and gentle microfiber tools. By switching to the 3-bucket method, controlling your water pressure, and drying your vehicle with care, you can maintain a flawless, scratch-free, high-gloss shine right in your own driveway!